Traditional Maltøl

After brewing the Washougøl, I read the book Viking Age Brew by Mika Laitinen. He mostly talks about Traditional Sahti brewing in Finland, but he also touches on the brewing of Maltøl in Norway and the unique brewing processes involved in making both beverages in the traditional way. He encourages people to brew beers inspired by these traditional beers, but respectfully asks that you not call them Sahti or Maltøl etc. unless you are following the traditional brewing processes to make them. In fact he says that following the processes is more important than using the exact correct ingredients (other than the yeasts). It’s for this reason I renamed my beer Washougøl as I had been calling it Washougal Maltøl, though it is not brewed in the traditional process that creates maltøl.
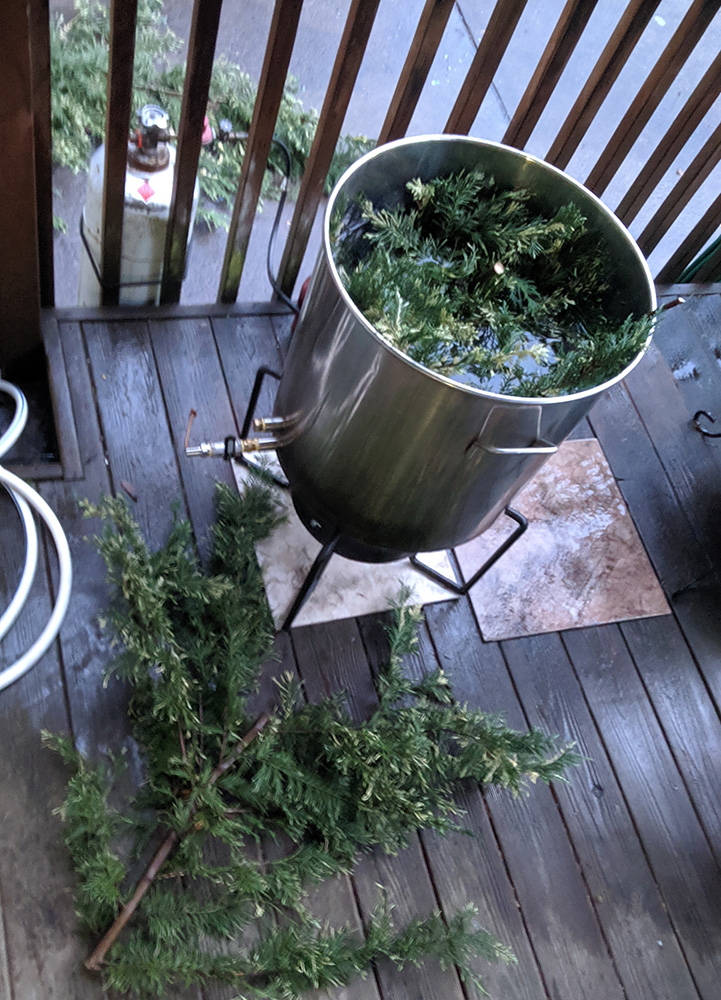
Heating Cypress InfusionAll of that to say that after reading the book I wanted to brew a beer that did follow the traditional brewing process for Maltøl. For the process I turned to Larsblog’s post about brewing Maltøl in Hornindal. For 120L of beer Terje Raftevold uses 25kg of pilsner and 25kg of pale malt, 300 grams of saaz (or whatever they sell at the pharmacy) hops, an unspecified amount of juniper branches and his family’s kveik.

I scaled his recipe down to fit my 15 gallon system (basically halved the ingredients). I substituted my homegrown glacier hops and cypress boughs instead of juniper. I split the batch three ways between 3 different kveik yeasts: Imperial Loki (an isolate from Voss kveik), Imperial Bartleby (an isolate from Hornindal kveik) and Ebbegarden kveik (original culture).

Terje’s process is to mash in very hot at 165F (74C) for an hour to an hour and a half with juniper infusion. So you boil the water with the juniper, then let it cool to mash in. Honestly at that high of a mash temp and that huge of a grain bill, just about boiling is where you want the water to be. After the mash rest (basically while the sparge infusion water heats to boiling) you drain and add more infusion to sparge. There’s no boil so the hops are added in a mesh bag to the hot wort as it’s run off. Once all the wort is collected you remove the hops and proceed with chilling the wort to around 90F or so and then pitch the yeast (and don’t forget the gjærkauk, of course).
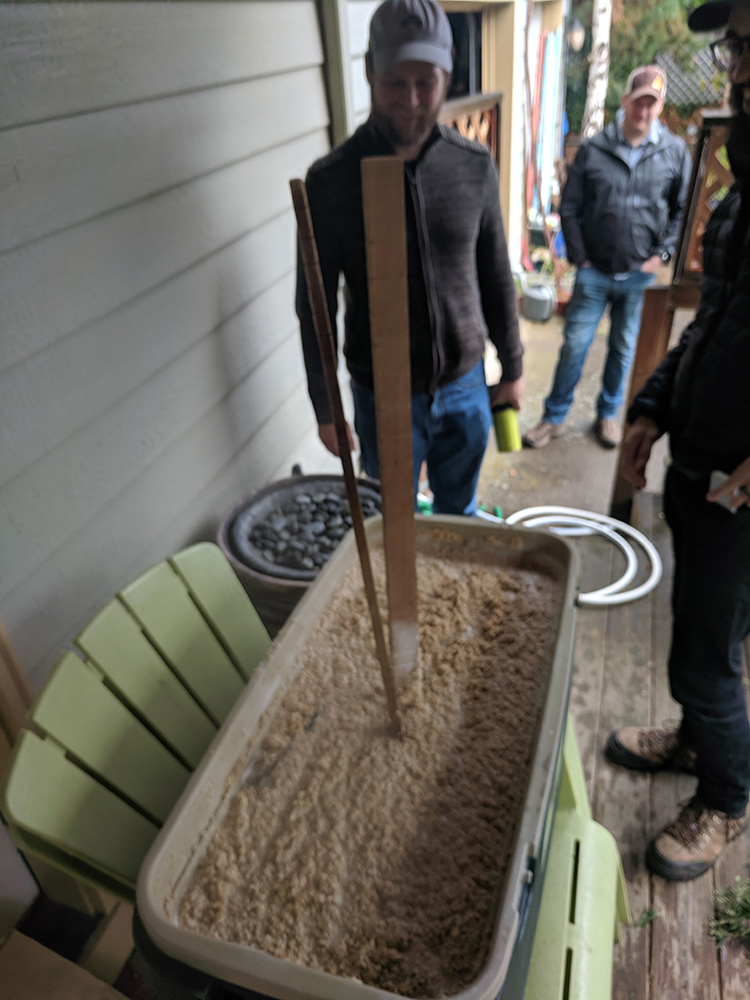
Thick mashFor my attempt I initially missed the high mash temp by about 12 degrees so it sat at around 154F for ~20 minutes or so while I boiled up a couple more gallons of cypress infusion and added that, which pushed it right up to where I wanted it. 55lbs of grain is about the maximum my mash cooler can handle, the mash was incredibly thick and I let it rest at 165F for about an hour and a half and then began draining it into my kettle with a bag of 6oz of homegrown glacier hops and my wort chiller.

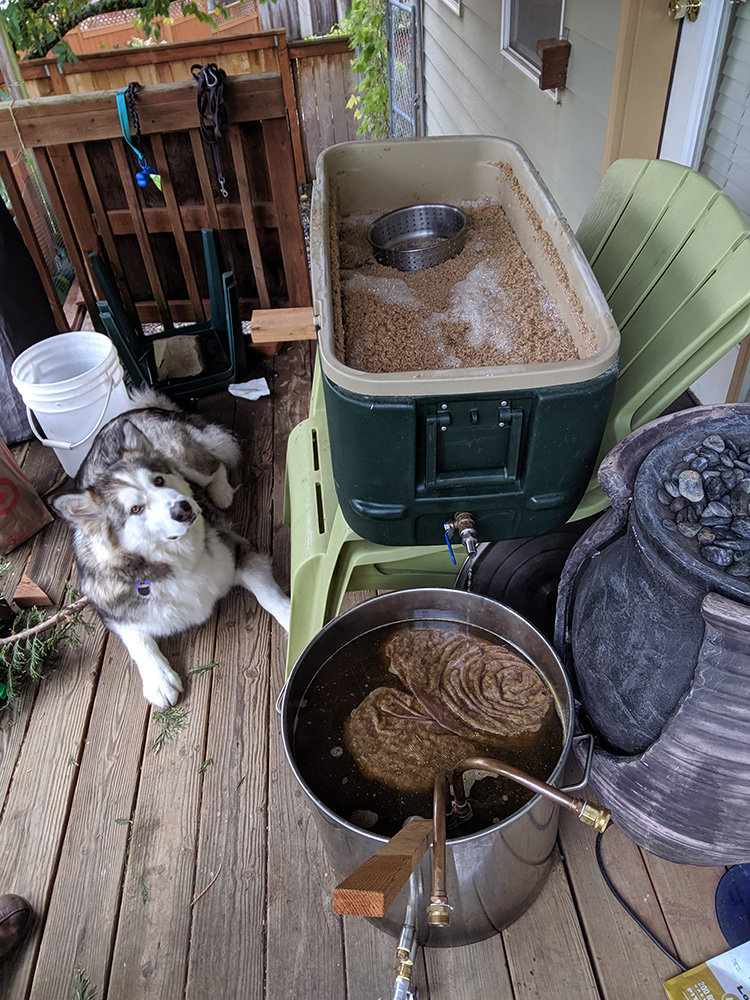
Terje drains into metal milk cans and then immersed them in cold water to chill, I used my wort chiller which probably works a bit faster. After the sparge had been drained and I had gathered around 16 gallons of wort I chilled to around 90F, drained the kettle into 3 carboys and pitched the three different kveiks. The OG of the wort was 1.108, this was WAY higher than Terje’s 1.075 so I guess either he gets terrible efficiency or I get good efficiency.

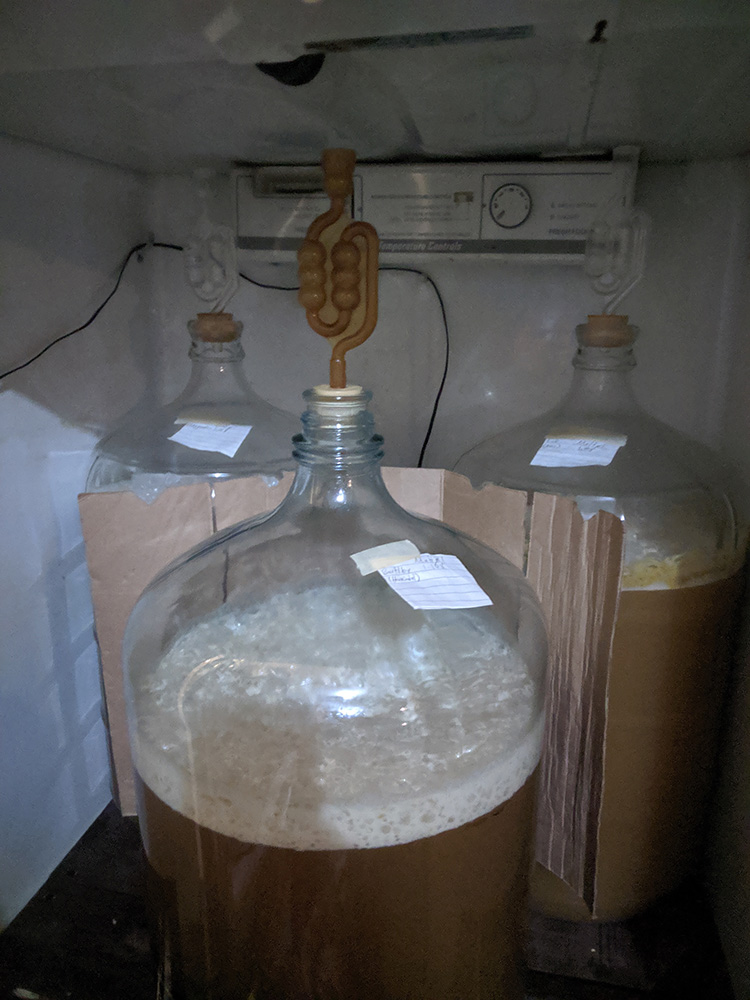
I placed the fermenters into my fermentation chamber with the temperature set to 33C. By the next day they were all full on fermenting and I let them go for a week to a week and a half before kegging them. Ebbegarden was finished and stable first (after about a week) finishing at 1.032 and 11.2% abv. Voss (Loki) was second with 1.016 and 13.4% abv. After a week and a half the Hornindal (Bartleby) was still working, but I needed to get it kegged to bring to a homebrew meeting where the topic was kveik. I kegged the last batch at a FG of 1.013 making it 13.8% abv. It was around this time that I realized that I had made 15 gallons of 11 to almost 14% beer to drink mostly by myself. Needless to say I was a little concerned for my health.
In the ferm chamberAll of the beers were really good, incredibly malty and fruity tasting with a good mouthfeel. There was a hint of the peanut butter flavor going on that I’ve noticed in some previous raw beers I’ve made but it wasn’t nearly as pronounced, you really had to be looking for it to notice it. I suspect this is because my previous raw beers used wheat and these did not.

Despite Ebbegarden’s higher FG it didn’t taste much sweeter than the other two, I think it did produce some acid which helped to offset the sweetness. Ebbegarden was also my favorite of the three, it had a lot of pineapple and banana flavor going on. Voss was tropical and orangey, but not as orangey as I had expected based on what I had read. Hornindal was just tropical fruity, but nothing I could specifically say it tasted like.

Would I brew Maltøl again? I think I will but I’ll aim for a more reasonable OG next time. Despite really enjoying the beer I couldn’t drink more than one a day without getting hammered so it took a while to get through it all. I also really want to make a Sahti where the mash is done in the kettle and slowly brought to a boil. Yes, the entire mash gets boiled and then drained off to ferment.
Draining the mash

Brewing Washougøl

Washougøl is a beer that’s inspired by Norwegian Maltøl. If you’re unfamiliar, Maltøl is an indigenous Norwegian farmhouse beer style. Traditional brewers use juniper branches to make an infusion and use that as their strike and sparge water, often juniper is used in the mash vessel as well to create a filter. These beers are very lightly hopped, if at all. They are fermented with landrace yeast that’s been handed down in the families and villages for generations and is known as kveik. You can read a lot more about this sort of beer and the different kveik yeasts over at Larsblog.

Maltøl is a bit of a catchall blanket term that encompasses a few different sub-styles that exist in Norway. Since my own version deviates in a few ways from these sub-styles that I’m aware of and since I live in Washougal and not in Norway I’ve called my beer Washougøl. Anyway, let’s talk about the differences and my thoughts/reasons behind them.

Juniper. Juniper is a staple in Norwegian farmhouse brewing, indeed it seems to be a staple in nearly all indigenous Nordic brewing from Norway, Sweden, Finland, the Baltic States and probably into Russia as well. The species used is Juniperus communis which is super abundant in these areas. Brewers basically cut a few branches from their hedge or whatever and they’re ready to go. While Juniperus communis does grow in certain parts of the pacific northwest it’s not incredibly abundant and mostly grows at the higher elevations of the Cascade mountain range. Instead of driving up to the mountains I decided to use an evergreen that’s very abundant on my property: Leyland Cypress. Leyland Cypress is a fairly common hedge tree in suburban PNW. It also makes a delicious tea as well as beer. For this beer I cut a few boughs and used them in the mash and also to make infusions for the strike and sparge water.

Hops. In traditional Maltøl hops are very restrained or even not used at all. They are typically homegrown or procured at the local pharmacy.  For my Washougøl I used only homegrown Glacier hops (partly because I have a shit ton of them) to give just a touch of bitterness to the brew and help beat back lacto. I suspect my Glacier hops have a rather low alpha acid in the 2-3% range, but I aimed for an IBU level of around 12 using hops in both the mash and toward the end of the boil.

Kveik. Kveik is yeast that has been passed down for generations from brewer to farmhouse brewer in Norway. While kveik is starting to become available to brewers around the world and is certainly an option for Washougøl, it wouldn’t be especially Washougally to use yeast from 5000 miles away. Instead I chose to use my local wild yeast culture that I’ve been using for 6ish years now. It’s obviously not handed down from my great grandfather but it does seem to be the dominant yeast in this area and it makes delicious beer, I’ve been using it for a while and it’s one of my favorite yeasts. You can be sure, if my daughter takes up brewing I will be handing it down to her.

Malt. In traditional Norwegian farmhouse brewing the malts were made on the farm. This is mostly due to a long standing Norwegian law left over from temperance times stating that anyone wanting to homebrew had to do so with homemade malts. A previous even longer standing law said any farm in Norway must produce beer. Both of those laws have been repealed in Norway and while some farms do still produce all the malt they brew with, most just buy pilsner or pale malt from continental Europe. For the Washougøl I used locally malted Superior Pilsen from Great Western Malt and Rimrock malt (a sort of vienna style rye malt) from Mecca Grade in Oregon. Rye is actually more common in Finnish Sahti than Maltøl but I wanted to give a little of that rye mouthfeel in this beer that I knew would be quite dry due to my (likely) STA1+ yeast selection.

Process. Maltøl is typically not boiled at all, though one sub-style boils for around 4 hours. I boiled Washougøl for one hour. I didn’t go for a raw ale because I want this beer to have a longer shelf life. Raw Maltøl contains a lot more protein and typically goes ‘off’ after a few months (though this may also have something to do with sanitation practices and the sparse use of hops). Boiling precipitates a lot of protein out of the beer and also gives opportunity to boil hops.

Recipe. My recipe was as follows for a 10 gallon batch:

Grain:
20lbs Great Western Superior Pilsen Malt
4lbs Mecca Grade Rimrock (to impress those judges)

Hops:
2oz homegrown Glacier hops in the mash
2oz homegrown Glacier hops @15 minutes

Other:
A bunch of fresh cut Leyland Cypress boughs in the strike and sparge water as well as the bottom of the mash tun. I didn’t weigh it.

Yeast:
1L starter of my wild(feral?) Abbey yeast culture, probably an underpitch…

Process:
Fill kettle with water for the strike, cut Leyland Cypress branches and stick them in a kettle and turn on the heat. Also cut boughs and lay them in the mash tun, I stuck smaller branches under the manifold in my tun. Target a mash temp of 156F, it’s also not a bad idea to actually heat the water up to boiling and then let it cool down to your strike temp to get a good cypress infusion.

Add 2oz of homegrown hops to the mash when mashing in, let it sit for one hour. While mashing add water for the sparge to your kettle along with more cypress boughs and heat that to boiling, let it cool a bit while you drain the mash of your first runnings, vorlauf if you feel like it. I’ve stopped bothering to aim for a specific mashout temp but you can target 168-170F if you want.

Drain the sparge into the same kettle with your first runnings and begin to heat the wort to boiling. Add 2 more oz of hops to the boiling wort with 15 minutes left in the boil.

When the boil is over, chill the wort, drain to fermentors and pitch yeast. I fermented at around 85F, for kveik you can push it even higher, I’ve fermented with my yeast up to 100F outside during a heat wave and had good results. 85F is about as hot as my chamber can get with its current heating elements. After about a month of fermentation I cold crashed the beer for a month or so before getting around to bottling because the competition I brewed it for got postponed.

I bottled with a low level of carbonation, around 2.0 volumes. Typically Maltøl is minimally carbed or even served completely still.

60 Second IPA

Certainly if you’re reading this blog you’ve probably heard of Dogfish Head’s 60 Minute IPA where they just constantly dump hops into a beer during the entirety of the 60 minute boil. It’s a fun concept and the beer is pretty good too. If you’re familiar with Dogfish Head you know they like to make a lot of weird beers. It’s a little bit frustrating as a crazy homebrewer when you come up with some brilliant and insane idea for a beer only to find out that Dogfish Head already did that.

So as an homage and also to one up those creative jerks I decided to make a 60 Second IPA. Instead of adding hops continually over the course of a 60 minute boil, I’ll add hops over the course of the last 60 seconds of the boil in an amount high enough to achieve the 40 IBUs required for the style. I actually came up with this idea way back in 2012, when I first heard about a new German variety of hop named Polaris. This hop boasts ~20% alpha acids (which is insanely high if you don’t know about these things). With that high of AA, you can achieve the necessary 40 IBUs in 60 seconds with less than a pound of hops in 5 gallons of beer.

A little while back I got my hands on a pound of Polaris hops (for free no less) so I figured I had to make good on this stupid idea. The recipe for 5 gallons is fairly simple:

  • 7lbs pale ale malt
  • 3lbs pilsner malt
  • 1lb carapils
  • 6oz Mecca Grade Opal 22 (you could sub with victory or biscuit malt)
  • 1lb Polaris hop pellets @ 1 minute 20.8% AA
  • Lallemand BRY-97

Mash at ~150F, drain, batch sparge etc. I think I boiled it for around 30 minutes, I wasn’t really counting. The hops were so sticky that they just came out of the package in a big chunk so my visions of kinda dumping pellets over the course of the entire last minute of the boil were killed because I’m lazy. I dropped the whole brick in there and I’m pretty sure that alone killed the boil though I left the flame on for the minute before turning it off and began chilling which took about 5 minutes with my hydra.

The brick of hops turned the wort from a nice golden color into what looked like pea soup. I used a manual whirlpool and a strainer to try to keep hop matter out of the fermentor, but it was still completely green when I pitched the yeast

Appearance: The beer pours a slightly hazy gold with plenty of pillowy head and tenacious lacing.

Aroma: The aroma is very fruity, reminiscent of pineapple and other tropical fruit, a hint of citrus is hiding in here as well.

Taste: Pretty intense fruity, juicy flavor; smooth bitterness, there’s a coolness to it that’s not just from the beer temperature, maybe this is what they mean by menthol from the hop, though I would definitely not say it tastes minty at all.

Mouthfeel: There’s a tingling on the tongue that I can’t quite place, probably a combination of the sting of carbonation along with the afore mentioned coolness.

Overall Impression: First of all, I’m blown away that this beer not only turned out drinkable, but actually pretty delicious. The hop flavor is really intense, the bitterness is restrained, and this beer could easily fit in amongst the hazies and NEIPAs that abound these days. Which makes me also wonder what I or others would have thought of this beer seven years ago…

If I were to make this beer again (which I might), I would probably use 13oz at the one minute mark, and reserve the other 3oz to use as a dry hop, if anything it’s a little lacking in aroma. Not that the aroma is low, but for the amount of flavor that smacks you in the face I feel like the aroma is a bit low.

After all this, I’m thinking that Polaris is an underappreciated hop that definitely has a place among today’s star IPA hops. I think it could easily hold its own against Citra, Mosaic, Galaxy, Ekuanot, Azacca etc. I think people see the menthol descriptor and run for the hills, but the other two primary descriptors are pineapple and ice wine. This hop is definitely worthy of more exploration.

Kveik Beer Tasting Notes

Appearance: The beer is a pale amberish to slightly red in color, with a respectable amount of head upon pouring that condenses into a mat of foam capping the beverage.

Aroma: A hint of roast (I assume from the victory malt) and subtle esters.

Taste: Malt and mild roast with maybe a bit of hoppy astringency. I think I don’t like the Sonnet Hops that I tried out for this beer. There are some subtle esters below the surface but nothing that really stands out.

Mouthfeel: Thin with high carbonation on the tongue. I may have bottled this too early.

Overall Impression: I don’t really like this beer all that much. Not that it isn’t a good beer, it is. There aren’t any off flavors that I can detect, I think it’s just the matter of I don’t like the Sonnet Hops. That said, I prefer the control I fermented with the same yeast (the one that came from my neighbor’s honey) that hadn’t been dried on a stick. The control seems to have more fruity esters and bubblegum flavor that I really like about this yeast. Now that I think about it, the kveikstokk yeast is a bit more similar to other wild yeasts I’ve captured from around the area here.

Kveikstokk Beer

Kveikstokk? What’s that?

Maybe you’ve heard of a Magic Stick? No? Kveikstokk literally translates from Norwegian to ‘yeast log’ in English. It’s basically a stick of wood that is used to store yeast between brews. Supposedly the origin story is that long before people understood what yeast was they noticed that brews tasted better if they stirred them with a certain stick. The theory being that good yeast from a previous brew stuck to the stick and transferred to the next brew via the stick.

I was inspired to give this method a try when I read about kveikstokker on Lars’ Blog. I have collected apple and birch branches from pruning trees on my property for use in the smoker so I decided I’d try to make a couple of kveikstokker from those branches. I used a rasp to take off the outer and most of the under bark, and then used a hand saw and a file to put some notches and grooves into them to give the yeasties somewhere to stick to and hide.

Once I had the sticks ready there was the matter of yeasting them up. I figured the best way to do this would be to toss them into fermenting beer so I brewed up some Belgian Pale Ale, split it into two batch and pitched my abbey strain in one and another locally harvested strain in the other. In a show of spectacular poor planning I found out at this point that the kveikstokk I had made from the apple wood was too fat to fit through the carboy neck, so only the birch kveikstokk made it into a beer to get yeasted up. It happened to be the beer with my abbey yeast.

After three weeks or so, the beer was done fermenting and in another display of poor planning I could not now remove the swollen with beer (and yeast) kveikstokk from the carboy. I racked the beer out of the carboy and for a while I was concerned that I was going to have to figure out some way of drying out the stick inside the carboy. Fortunately with much tugging, cursing and wiggling I was able to extract it and hang it up to dry. Once it was dry I put it into a plastic container to keep it safe from day to day banging around the workshop until I brewed again. Lucky for me, I happen to own a gallon jug with an extra wide neck so my issues with carboy necks weren’t an issue when using the kveikstokk to ferment a beer.

Eventually I brewed up another Belgian pale ale and I was able to use it. I placed the kveikstokk into the sanitized jug and filled it to the shoulders with wort affixed an airlock and placed it inside the fermentation fridge along with the main batches of the beer.

After two days there was still no action on the kveikstokker beer and I was wondering if it was going to work. My worries proved unfounded as on the third day krausen formed and it looked to be fermenting just fine. Hooray! It worked! After three or so weeks it appeared to be done fermenting, as did the larger batches with normal pitches of yeast. I bottled the beer and hung the kveikstokk up to dry again. After the beer had been bottled for a bit more than two weeks I chilled a bottle down and poured myself a glass. It was decent, but not as good as the large batch of beer that I used a normal pitch of the abbey yeast on. I’ll do some honest to goodness tasting notes on both of the beers in a few days.

This was a fun experiment and I think I’d like to give it a try with some of my other wild yeasts; probably one of my cultures that (I believe) contains brett. Brett is supposed to be able to break down uber complex wood sugars so it seems like living on a stick wouldn’t be a difficult feat for such a beast. So that may be in the future. Maybe I’ll whittle the applewood down so it’ll fit into a carboy neck and toss it into a brett ferment. Other than that, I’m not sure if the kveikstokker is a great idea for a direct pitch. I do also want to try using it to inoculate a starter, build the starter up and then pitch that in tandem with the same yeast from my typical starter/pitch procedure. It could be that this is some sort of strange way of storing yeast (maybe as a backup) for the long term?

Want more pics?

Update: Tasting notes

Brewing a Cypress beer

In Norway there is a tradition in a lot of farmhouse brewing to use a juniper infusion for your strike and sparge water. Basically, strike and sparge water are heated in the kettle with juniper boughs. Additionally, juniper boughs are used in the mash vessel as a filter bed/false bottom to aid in lautering.

I don’t have access to much juniper where I live, but I have a bunch of Leyland Cypress trees on my property and the boughs of this tree make a really nice tea. So I thought it would be an interesting experiment to try making beer using cypress infusion in the spirit of traditional Norwegian brewing. It didn’t hurt that I am of Norwegian ancestry either.

So I trimmed a few branches off of a tree and set up my HLT and mash vessel with a bunch of cypress boughs for the brew.

I also took this opportunity to attempt a 15 gallon batch of beer. I have a 19 gallon boil kettle so I can’t quite do a full boil without making a huge mess via boiling over but I can get pretty close. I figured I’d just top up at the end of the boil before chilling, which is what I did.

The strike water had a nice piney aroma to it, I hopped with all glacier hops, which, if you’re not familiar with them, they are described as ‘hoppy’ which seems unhelpful, but it actually fits quite well. I really like these hops and I’d like to get some rhizomes to grow them next spring.

For the 15 gallon recipe I used the following ingredients:

  • Loads of spruce boughs (I didn’t weigh them) for the strike and sparge water, and also in the mashtun.
  • 18lbs Pilsner Malt
  • 2lbs Aromatic Malt
  • 2lbs Cara-pils Malt
  • 2oz Glacier Hops (first wort) @90 Minutes
  • 1oz Glacier Hops @10 Minutes
  • Mute Dog Abbey Yeast
  • Mute Dog Palatki Yeast
  • Brewery Ommegang House Yeast

Each of the three yeasts fermented a separate 5 gallon batch of the beer. I ended up unintentionally mashing a lot lower than I had planned. I think my problem is inaccurate volume measurements when I pour the strike water into the mash vessel. Anyway I mashed at about 148F for an hour and did a 90 minute boil. At flame out I topped my wort up to 15 gallons and chilled it down to 75-80F and drained into 3 separate carboys for fermenting with the three different yeasts. The OG was 1.039, one point higher that BeerSmith calculated.

After 2-3 weeks of fermentation I took some gravity readings and the gravity for each batch was crazy low ~1.001. I sampled all three batches and they were good, very dry somewhat saisony tasting. I kegged the batch that fermented with my Abbey yeast and left the other two batches alone.

After drinking off the keg for a bit, I felt like you couldn’t really taste much in the way of cypress in the beer. There was just a hint of something slightly different about the flavor of the bitterness that maybe might possibly be cypress, but it if you didn’t know about the cypress, you probably would even notice, let alone identify it as cypress.

I decided to try dry cypressing one of the other two batches. The beers had been in primary for about two months by this time. The batch with the palatki yeast looked to be forming some sort of brett pellicle so I figured I’d leave that one alone to get funky and dry cypress the batch with the ommegang yeast. I took another gravity reading and it had gone down to 0.997!

I collected 12oz of additional cypress boughs and added them to a brew bucket, then I racked the beer onto them, sealed up the bucket and put an airlock on. I let them steep for about a week before racking the beer into a keg. The beer has been in the keg for almost a week now and it is just beginning to get fully carbonated. It tastes incredible. I may have overdone the dry cypressing, it is intense in the aroma and flavor of the beer. An earthy, woody, aroma, followed by a fruity, almost christmas tree but not quite, citrusy/ascorbic acid flavor, with some malt and hop bitterness in the background.

I really like it a lot.

I’m not sure what fate lies in store for the last 5 gallon batch, I figure I’ll let it hang out for a few more months and see if the brett does anything interesting to it. I do know that I definitely like this beer and it will likely need to become part of some sort of seasonal rotation or something. I do want to see how the flavor might be different from boughs harvested in the spring vs late summer as my wife tells me she can definitely taste a difference in the tea she’s made recently vs the stuff made in the spring.

View all the photos from the creation of this beer on imgur.

Harvesting yeast from honey

This has got to be one of the easiest ways of harvesting wild yeast, at least of the methods I’ve tried it worked on the first try and I’ll be brewing a beer to ferment with this yeast this coming weekend.

As you may know honey is naturally preservative, ie it won’t ever spoil on its own. Honey has some natural anti-bacterial properties in it, bees are pretty awesome that way. Of course one of the main reasons that honey won’t go bad is because sugar is a preservative. Yes, sugar. Ever noticed how the bag of sugar in your pantry also never goes bad? Sugar at very high concentrations is a preservative. Think of the fruit preserves your grandma used to make perhaps.

Anyway just because honey is a preservative doesn’t mean there’s not some of our friendly yeasty pals sleeping dormant in the honey just waiting for it to become diluted enough to get to work on all that glorious sugar. The key to harvesting yeast from honey is to get raw or unpasteurized honey. I was lucky enough to buy a whole bunch from a neighbor of mine that keeps hives in their back yard. So the yeast is a uber-local, yay!

Anyway, what you do is get a sanitized container, like an ehrlenmeyer flask or heck use a clear beer bottle. Add some of the unpasteurized honey, add about 4-5 times as much water as honey, plus a bit of yeast nutrient or energizer. Swirl it all up to dissolve the honey and nutrient in the water and then stick a bung and airlock on and wait. Don’t become discouraged it may take a few days, my concoction sat around doing what looked like nothing for a couple of days before I noticed the beginnings of fermentation.

I’ve only done this once and it worked, and was not contaminated so I’m not sure if that’s typical with harvesting yeast from raw honey or if I’m just lucky. However you will likely be able to tell by sight and smell if you have an infection. if it looks like you’ve just got yeast let it ferment completely and let the yeast settle. Then draw off some of the fermented liquid (which is technically mead) with a thief or baster and give it a taste. Mine had some fruity notes which I’m not sure if they were from the honey or the yeast (the local honey had a really fruity flavor to it) and no off tastes like bandaid or solvents.

If the yeast seems good then on to the next step: ferment a beer with it! which I’ll be doing hopefully this weekend. I put together a simple recipe for a sort of belgian pale ale and I’ll be adding my small starter of wild yeast to it and see what I get.

Is this beer infected? Yes it is.

A lot of threads over on the Homebrewing Subreddit ask if their beer is infected, and 99% of the time it’s not. Well this beer is infected! I infected it myself. Here’s the story:

A while back I harvested two different wild yeasts, one from some juniper berries I picked at the Palatki indian ruins in Sedona, AZ and the other from a date purchased at the local super market, though the date originated in Mexico. Both of these sources provided me with yeast and bacteria when I initially added them to starters. I washed these starters using chlorine dioxide (which I should really write a post about). I’d never washed yeast before and I wasn’t entirely confident that I wouldn’t kill the yeast along with the bacteria, so I saved a bit of each starter aside before I washed. The washing process did work however and I got my yeast sans-bacteria, these two strains became my Palatki Strain and my Fruity Strain respectively.

Since I am lazy I just kinda left the two vials I saved some of each initial strain out (covered of course) in my office for a few months, one of them grew a strange goopy yeast colored sort of pellicle, they both got rather sour (yes I did taste them). I have been wanting to brew up some sort of lambic-like beer and I thought to myself, I will just blend these two infected starter batches together and step that up and put it into a beer. So that is what I did. I won’t know how the beer turns out for a long while yet, but I pulled the beer out of my fermenting fridge today after being in there for 3-4 weeks in preparation to rack it into a new carboy for an extended secondary. and it had the funky pellicle on top. It is definitely infected:

So there you go, if you were wondering what an infected beer looks like. This one is infected and that’s what it looks like. Other infections can look different, but this is how mine looks.

I gave it a whiff after moving it and it has a sour but very fruity aroma, I’m looking forward to this beer, I think it’ll be excellent and I’ll have my very own bug farm for future sours.

Rhubarb Menace

There is a concotion that has been growing in popularity in some homebrew circles, and I’ve even seen something like it being produced by some commercial breweries. It’s called Graff, and it’s a hybrid of beer and cider, though arguably more cider than beer, though I suppose that depends on how you decided to build a recipe. I don’t have access to a lot of apples, however I do have access to a lot of rhubarb. now rhubarb and apples aren’t particularly similar, except they both have malic acid as their predominant acid. I figured this was good enough reason to try making a graff with rhubarb instead of apples.

Thus was born Rhubarb Menace.

Some of the other differences in rhubarb and apples is the amount of sugar. Apple juice will have around 5% sugar, rhubarb has pretty much no sugar to speak of. Rhubarb also has a much stronger concentration of acid compared to apples so I don’t need as much rhubarb to achieve a similar amount of acid/flavor compared to apples. To make up for these differences I added table sugar (sucrose) and water to my recipe to sort of simulate apple juice but made from rhubarb.

As for the grain bill, ‘traditional’ graff has got some wheat to aid in head retention, a bit of crystal malt, and a bunch of light dry malt extract or just pale malt. I kind of wanted to have a red color in my graff so I decided to go with some Carared crystal malt, I also wanted some caramelly flavors so I added a crystal 120, and also a pound of two-row and a pound of wheat.

My recipe ended up as the following:

* 10 Lbs Rhubarb * 3 Lbs Carared * 2 Lbs table sugar * 1 Lb Crystal 120 * 1 Lb malted two-row barley * 1 Lb malted wheat * 8 oz Ginger Syrup (@10 minutes) * 1 oz Cascade Hops (@15 minutes) * 1 Tbsp Calcium Carbonate * 1 Tbsp Pectic Enzyme * 1 tsp Yeast Nutrient * Wyeast Belgian Ardennes yeast

I put the rhubarb in the fermentor with the sugar, calcium carbonate, and pectinase to thaw in the morning.

In the evening I did a fairly large minimash with all the grain in ~2 gallons of water. That went pretty well but it was a bit large for the small pot I was using. Regardless I seemed to get pretty good efficiency.

After the boil I strained out the hops and poured the hot wort over the top of the still partially frozen rhubarb, this worked pretty well to cool the wort down. Then I filled the fermentor with additional water to about the 5.25 gallon line. The temperature was around 72F so I pitched the yeast and sealed the fermentor. OG 1.048

Fermentation took off and it went pretty well. I pressed the rhubarb after a week and left the beer in the primary, it had fermented fairly quickly and a lot further down than I (or hopville) had anticipated; it was at around 1.008 at pressing. It looks like the Ardennes yeast ate pretty much all of the sugar except for the stuff from the Crystal 120. I’d adjust the recipe for future batches to include additional crystal malt (I know carared is crystal but apparently it’s not crystal enough).

Tasting it at pressing I was unimpressed, it didn’t taste bad or anything but it also didn’t taste good, it was a really sort of meh. I knew from some of the talk about graff that age is very important to the beer’s flavor so I held out some small hope.

I left it in primary for another week, then I transferred it to a keg. FG was 1.006 for an ABV of 5.6% it was tasting slightly better after the week but I was still unimpressed.

After 2 weeks in the keg the flavor had improved drastically, the flavors really came out and can be picked out when you taste it as opposed to before when it was just a muddy mess. It is a sour beer (how could it not be?) with a slight fruitiness and some malt in the background, it tastes a lot like a sour red ale, if you like sour beers you will probably like this. I’m quite pleased with how this has come out especially after being fairly concerned with the initial tastes at pressing/transfer.

As I mentioned above, I would adjust the recipe to include a bit more dark crystal malt to leave some additional residual sweetness and boost the malt flavor a bit more, and maybe use a munich malt instead of two-row. I can’t taste the ginger at all so I’d just leave that out and probably increase the hops. Obviously this could use a bit of refining but I’d call this first try a success.

Ahab’s Ruin

With the success of my Dark Cherry Whatever I decided I would brew another beer and ferment it using the leftover pressed fruit from a wine. This time I used the crushed and dessicated grapes from my small grape harvest this year. I had enough grapes this year to make about a gallon of wine, I pressed the grapes and then added the pomace into a batch of Merlot that I made from canned concentrate, then I pressed them again and put them in the freezer until I was ready to make this beer.

After doing some research I found out that Dogfish Head had made a wine-beer hybrid call Red-White which was a Wit style ale with Zinfandel grape juice added. Since I like Wit beers and my grapes were red (they’re Marquette). The name for this beer came from a friend of mine suggesting I call these wine-ale hybrid beers ‘Wale’ so Wit Wale became Ahab’s Ruin which is probably a bit dramatic.

Here you can see the pot starting to heat up and some of my ingredients, including the grape skins and slurry in the plastic bag on the right.

I put together a fairly simple recipe for the beer, basically half wheat extract and half table sugar (to simulate the grape sugar if unfermented grapes had been added) a bit of Crystal 40 for some color and more complex sugars. Instead of the traditional hops, because let’s face it, this beer is already off the map in terms of tradition, I used Cascade hops from my yard (they’re free and I have loads of them) and, of course, coriander and orange peel. Half of the coriander came from my garden, but apparently an ounce of coriander is a lot of coriander seeds and I had to supplement with some store bought seeds.

Once the beer had been brewed and cooled I put in in the fermentor and added in the grape skins, seeds, yeast slurry and whatever other residue was left over from the wine fermentation that I had saved. I poured it into a mesh bag in the fermentor, which I highly recommend doing if you’re going to be doing this sort of thing. The beer/wale fermented fairly well though it took the yeast a little while to get started, I think this is probably because the yeast had been frozen, and maybe because the montrachet yeasts were like, “Hops? What the heck is hops?” But they got the job done in the end, fermenting down to 1.005, I was worried that it might end up being too dry.

Once the beer was done fermenting I kegged it since I recently got some a kegging system set up (which I can’t reccommend enough over bottling). It did not turn out too dry, there’s just enough malt sweetness to balance the spice of the coriander and the fruity sourness from the orange peel and grapes. I’m pretty pleased with how this came out and I’ll be making this again with next year’s grapes.