Kveikstokk Beer

Kveikstokk? What’s that?

Maybe you’ve heard of a Magic Stick? No? Kveikstokk literally translates from Norwegian to ‘yeast log’ in English. It’s basically a stick of wood that is used to store yeast between brews. Supposedly the origin story is that long before people understood what yeast was they noticed that brews tasted better if they stirred them with a certain stick. The theory being that good yeast from a previous brew stuck to the stick and transferred to the next brew via the stick.

I was inspired to give this method a try when I read about kveikstokker on Lars’ Blog. I have collected apple and birch branches from pruning trees on my property for use in the smoker so I decided I’d try to make a couple of kveikstokker from those branches. I used a rasp to take off the outer and most of the under bark, and then used a hand saw and a file to put some notches and grooves into them to give the yeasties somewhere to stick to and hide.

Once I had the sticks ready there was the matter of yeasting them up. I figured the best way to do this would be to toss them into fermenting beer so I brewed up some Belgian Pale Ale, split it into two batch and pitched my abbey strain in one and another locally harvested strain in the other. In a show of spectacular poor planning I found out at this point that the kveikstokk I had made from the apple wood was too fat to fit through the carboy neck, so only the birch kveikstokk made it into a beer to get yeasted up. It happened to be the beer with my abbey yeast.

After three weeks or so, the beer was done fermenting and in another display of poor planning I could not now remove the swollen with beer (and yeast) kveikstokk from the carboy. I racked the beer out of the carboy and for a while I was concerned that I was going to have to figure out some way of drying out the stick inside the carboy. Fortunately with much tugging, cursing and wiggling I was able to extract it and hang it up to dry. Once it was dry I put it into a plastic container to keep it safe from day to day banging around the workshop until I brewed again. Lucky for me, I happen to own a gallon jug with an extra wide neck so my issues with carboy necks weren’t an issue when using the kveikstokk to ferment a beer.

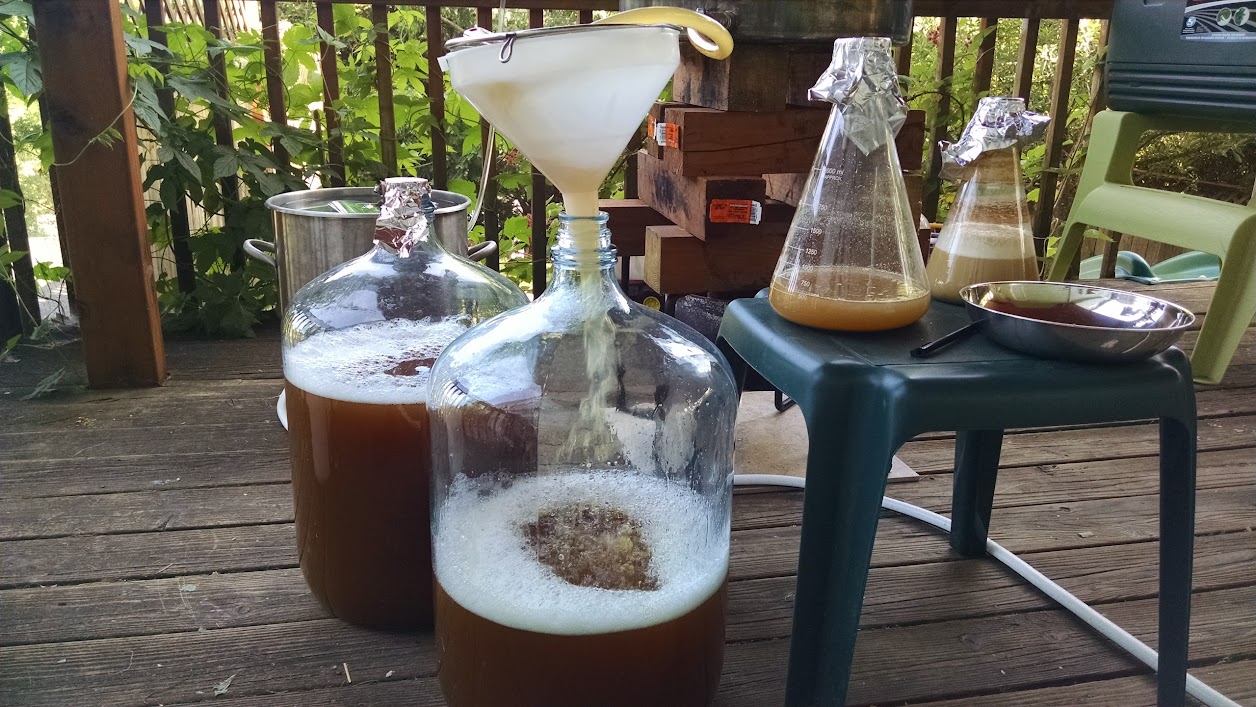
Eventually I brewed up another Belgian pale ale and I was able to use it. I placed the kveikstokk into the sanitized jug and filled it to the shoulders with wort affixed an airlock and placed it inside the fermentation fridge along with the main batches of the beer.

After two days there was still no action on the kveikstokker beer and I was wondering if it was going to work. My worries proved unfounded as on the third day krausen formed and it looked to be fermenting just fine. Hooray! It worked! After three or so weeks it appeared to be done fermenting, as did the larger batches with normal pitches of yeast. I bottled the beer and hung the kveikstokk up to dry again. After the beer had been bottled for a bit more than two weeks I chilled a bottle down and poured myself a glass. It was decent, but not as good as the large batch of beer that I used a normal pitch of the abbey yeast on. I’ll do some honest to goodness tasting notes on both of the beers in a few days.

This was a fun experiment and I think I’d like to give it a try with some of my other wild yeasts; probably one of my cultures that (I believe) contains brett. Brett is supposed to be able to break down uber complex wood sugars so it seems like living on a stick wouldn’t be a difficult feat for such a beast. So that may be in the future. Maybe I’ll whittle the applewood down so it’ll fit into a carboy neck and toss it into a brett ferment. Other than that, I’m not sure if the kveikstokker is a great idea for a direct pitch. I do also want to try using it to inoculate a starter, build the starter up and then pitch that in tandem with the same yeast from my typical starter/pitch procedure. It could be that this is some sort of strange way of storing yeast (maybe as a backup) for the long term?

Want more pics?

Update: Tasting notes

Brewing raw ale


Filling fermentors with unboiled wort

This past weekend I was able to try a brewing technique that I’ve been wanting to do for a few months now: Brew a no-boil beer, AKA Raw Ale. most brewers have been taught that you have to boil beer, that’s just the way it is and it’s not something to be questioned. Kind of like how beer always has to have hops and barley. None of these is necessarily true, and most of these requirements stem from laws governing commercial production of beer some of them dating back hundreds of years. The truth is, before the advent of large metal pots for boiling in and cheap abundant fuel sources, it was more likely that most beer was not boiled, just heated enough to hasten the conversion of starches to sugars. I’ll admit right off that the historical aspect of this is appealing to me, but more appealing is the amount of time and fuel I can save by brewing this way; practicality FTW.

But wait, you say, isn’t boiling necessary for various practical purposes, like sanitization and hop isomerization? The answer is not exactly. The three main reasons to boil your beer generally taught is to pasteurize your wort to prevent unwanted infection, to boil off DMS which will otherwise make your beer taste like canned corn, and to isomerize and dissolve alpha acids from hops into the wort to lend bitterness to your beer. There are some other things that also happen in the boil but these three are often touted as the main reasons why you have to boil your wort. Let’s talk about them.

  1. Boiling pasteurizes your wort. Actually pasteurization can happen at much cooler temps than boiling. It will happen in 30 minutes at 150F and in like 3 seconds at 160F. So your standard hour long mash should be effective pasteurization for your wort.
  2. Boiling drives off DMS. This is true, the thing we’re missing is that DMS doesn’t form until the wort reaches 175-180F so if you don’t go above this you don’t get DMS.
  3. Boiling isomerizes and dissolves alpha acids from hops. This is true and is the biggest drawback to brewing raw ale. However you can get some isomerization and IBUs by putting hops in your mash. By using high alpha varieties (I like Horizon) and in large quantities you can achieve an IBU level that is fine for a number of styles; styles I happen to enjoy. You’d probably have trouble getting to IBU levels required for a double IPA with this method, but for belgian/farmhouse styles 10-15 IBU is ok. I’ve also thought about adding hops in your strike and sparge water, I’ve read that you need some sugar in solution to get isomerization but have never actually seen any science backing this assertion up.

So having rationalized away most of these requirements, I felt confident to give raw ale a try. Due to it being Father’s Day weekend and me having an awesome wife, I was able to brew on Saturday and Sunday. This did indeed shave a couple hours off of my brew day so I was happy about that (and so was Anne). I brewed a spruce beer on Saturday and a lemon balm and cypress beer on sunday. I used slightly different techniques for each to see sort of what that would do for the beers.

Spruce beer


hopped strike water in the mash

For this beer I used the following recipe:

  • 14 lbs Northwest pale malt
  • 6 lbs Munich 20L
  • 4 lbs Flaked wheat
  • 4 oz Horizon hops (11.5% AA) in the mash for 70 minutes (60 minutes saccharification + 10 minutes mashout)
  • 4 oz Spruce tips in the mash for 70 minutes (60 minutes saccharification + 10 minutes mashout)
  • 4 oz Spruce tips in the mash for 40 minutes (30 minutes saccharification + 10 minutes mashout)
  • 4 oz Spruce tips in the mash for 20 minutes (10 minutes saccharification + 10 minutes mashout)

I mash in a cooler and I add water that’s well above my strike temp to the room temp cooler, then let the water cool to my strike temp before doughing in. Right before I added the water I though, i should add some hops now, so I dumped in about half of the 4 oz right before I added the 180F water to the mash cooler. It took about 12 minutes to cool to my strike temp of 166F when I added the grain the rest of the hops and the first charge of spruce tips. After 30 minutes I added the second charge and sorta kinda stirred them into the mash and the same again 20 minutes later. After the full 60 minute mash the temp was down to about 150F which is more than I typically lose. I’m going to blame opening the mash up twice and adding cold/frozen spruce tips to it; still an acceptable loss. I vorlaufed about 3 gallons until it was running quite clear and drained the mash. My first running gravity was 19° Brix (1.077) according to my refractometer. I added 7.5 gallons of sparge water at 180F and achieved a mashout temp of 168F that I let sit for 10 minutes and then vorlaufed and drained again. Second running gravity was 8.4° Brix (1.034).

After draining the sparge, I began chilling the wort for pitching yeast, hey, it’s a no boil! Chilling didn’t seem to be much shorter than when I boil which does make sense. Once I got it down to 80F I drained into two carboys and pitched yeast. For this beer I’m trying out a new local yeast I harvested in some final runnings from my last brew day in the spring that I left sitting open to the air while I cleaned and put everything away then I added a plum blossom from my tree and it was fermenting by the next day. The other half got my other test local yeast that has proven itself in a few batches already and I’d like to see the differences between these two. As part of my ongoing investigation into the theory that the dominant yeast around my neighborhood is an expressive fruity bubblegum belgiany yeast. The OG for the beer was 12.4°Brix (1.050) according to my refractometer and 1.046 according to my hydrometer so I’m not sure what to believe.

Update: Tasting notes for the spruce beer

Lemon balm and cypress beer


Lemon balm, cypress and hops in the mash cooler

On Sunday I brewed this recipe:

  • 11 lbs Northwest pale malt
  • 9.25 lbs Pilsner malt
  • 3.75 lbs Munich 20L
  • 3 oz Glacier hops (5.6% AA) in mash for 80 minutes (+ mashout)
  • .75 oz East Kent Golding hops (5.9% AA) in mash for 80 minutes (+ mashout)
  • .75 oz Fuggles hops (6.3% AA) in mash for 80 minutes (+ mashout)
  • 8 oz Leyland Cypress boughs in mash for 80 minutes (+ mashout)
  • 7 oz Lemon Balm plants in mash for 80 minutes (+ mashout)
  • 1 oz Glacier hops in first wort/whirlpool?
  • .5 oz Saaz hops in first wort/whirlpool?
  • 4 oz Leyland Cypress boughs in first wort/whirlpool?
  • 7 oz Lemon Balm plants in first wort/whirlpool?

For this beer I just dumped all of the herbal and hop mash additions into the mash cooler before I added the hot water that had to cool down it also took about 12 minutes to cool to strike temp and then I mashed for 60 minutes at 154F then I added 4 gallons at 207F to step up to 170F for 20 minutes. Beersmith says I should get around 8.5 IBUs from these mash hops. Then I did a vorlauf and drained into my kettle that had the first wort/whirlpool (i’m really not sure what to call that addition? first wortpool?) herbs. Then I sparged with 3.5 gallons of water at 170F to get a rinse of the remaining sugars. First running gravity 15° Brix (1.061), second running gravity was 9° Brix (1.036). Then a chilled, split between two fermentors and pitched yeast, one a combination of my two wild strains that contain brett and the other my first local yeast from the area. OG 13.2° brix (1.053).


Hops, cypress and lemon balm chilling in the first wortpool

My thought with the first wort/whirlpool additions is to get some more flavor and aroma from those hops and herbs. I’m not certain I’d really get much in the way of IBUs out of hops in this addition, but possibly? The reality of hops is that it’s not IBUs that give their preservative effects, if it was then stuffing casks of IPAs and other beers with dry hops for the voyage to India would have been pointless for the British. I also know a guy who added hops to a batch of pickles and they didn’t ferment, so IBUs don’t matter for preservation, just bittering, though other hop flavor compounds can give a perception of bitterness as well.

Update: I’ve added some misc notes and observations in a new post. Tasting notes to come soon.

Update: Tasting notes for the lemon balm and cypress beer

How to harvest wild yeast

A number of people have inquired about my process of capturing wild yeast for use in my beers so I figured I should write up a detailed post about my process, which is actually fairly low tech and easy for anyone to do. I don’t capture yeast from the air, I’ve never tried so dont ask me anything about how to do that. I’ve captured almost all of my yeast from fruit and that’s what I’m going to show you how to do here.

Step 1: Find some fruit.

Almost all sugary fruit has got yeast hanging out on it waiting to get access to that sugar to have a feast. I recommend using fruit you grew yourself or wild foraged that way you know for certain that it hasn’t been treated with any chemicals or irradiated to kill those wonderful yeasties that you’re after. That said, I’ve captured yeast from dates imported from Oman and Mexico, and even from some cherries I got at walmart so if you don’t have access to a fruit filled garden don’t let that stop you. If you are going to get fruit from the store, I recommend organic, though it’s not required.

Step 2: Make a (hopped) starter.

Make yourself a low gravity starter (1.020-1.030), 300mL is plenty if you get something good you can step it up later. Add a touch of yeast nutrient to the starter. If you want to decrease your chances of getting lactobacillus and pediococcus (and other bacteria) drop a hop pellet or two into your starter when you’re boiling it. You don’t need to do a long boil for the hops, they are anti-bacterial even when not isomerized. Don’t bother trying to decant off the hop gunk or filter them out, it doesn’t matter and you’ll just contaminate your wort which is reserved for the next step.

Juniper berries and branches in a starter

Step 3: Add the fruit to the starter.

Take the fruit you’ve selected and add it to your starter. You have now pitched the yeast into your starter. Swirl it up really well to add some oxygen and then put an airlock on the starter. I know this is against the logic of starters where you want lots of oxygen for yeast to be able to reproduce, but with a wild inoculation there are other things that need a good supply of oxygen that you don’t want to grow, like acetic acid bacteria and mold. Put the airlock on, you can use foil when you’re stepping up something good later on. It may take a week or even longer before you see activity, don’t despair. While there is yeast on fruit, there’s generally not a whole lot of it so be patient.

Step 4: Determine if you got something worth pursuing.

Once you start seeing activity, you should get some sort of a krausen on your starter. Now it’s time to determine if you got something good. Take the airlock off and give it a good sniff. If it doesn’t smell like vomit you’re probably good to go. If it smells good leave it alone to let it finish fermenting and flocculate out. Once the foam has died down and the yeast has settled stick it in the fridge to crash. Make a step up starter at this point if you think you’ve got something good. Once it’s crashed use a thief/baster to decant the ‘beer’ off the top of the yeast layer. I stick a racking cane cap on the tip of my baster so I don’t have to worry as much about sucking up yeast from the bottom.

Smell the beer and if it doesn’t smell off, give it a taste to see what you’ve got. Look for esters and phenols, as well as off flavors. If you do have some butyric acid (pukey or parmesan flavors) in small quantities don’t worry, you may have had some enteric bacteria initially but they have a very low alcohol tolerance so they should have died off after the yeast got going. If you step this up that flavor will likely be gone. Additionally brettanomyces can eat the butyric acid and make wonderful pear flavors out of it. If your beer is sour you probably got lacto as well as yeast, if this is what you wanted, great! if not, you can dump it and start over or try washing the yeast which I’ll have to write a different post about.

If it smells and tastes good, step it up with a bigger starter to build up a pitchable population for a batch of beer. Congrats you’ve got some wild yeast to make delicious beer with!

Yeast from an Omani Date

Some additional notes:

If you want to increase your chances of getting something good that’s not contaminated with something awful you could add the same fruit to a few starters, I’ve never actually done this though. My success rate has been better than 50% for getting something good that makes good beer vs getting things that were just weird/off or moldy that I dumped.

Some fruits are likely more prone to have nasty on them: Strawberries seem to rot if you look at them wrong, I’ve never used one to harvest yeast but I feel like that would be a waste of time and effort. Apples are often used to start sourdough cultures so if your looking for sour bugs that’s a good place to start, otherwise I’d avoid it. Obviously don’t use overripe or rotting fruit. I’ve had good luck getting just yeast cultures off of grapes and dates in particular, raw honey is another good one to try.

If you were going for just yeast, you probably got a mix of saccharomyces and brettanomyces in your starter, keep this in mind particularly if you are bottling the beer, the brett can keep on working on higher chain sugars for a long time and you may end up with overcarbed beer or even exploding bottles, this can be minimized if you store the bottles in the fridge after conditioning. Personally I like to save off a gallon of my first beer with a new wild yeast and just let it sit for 6+ months to see if it does anything interesting. I have one strain that starts out fruity like english strains and after a few months those give way to spicy saison-like phenols. This is likely the action of both sacc and brett, but I don’t have a microscope so I don’t know for sure.

I generally harvest the dregs from my first batch in a jar that I keep in the fridge. Then when I want to make an new batch with that yeast, I take a small amount from the jar and step that up in a starter. You can however keep harvesting the dregs and reusing them each time, this will eventually select for yeast that is more flocculant and yeast that gets going quicker, in other words any brett and other yeast that takes its time will be weeded out.

Sled Dog Christmas Gruit

A member of my homebrew club suggested that we brew up the “twelve beers of christmas” mentioned in Randy Mosher’s Radical Brewing. This idea was met with much enthusiasm and soon enough we had thirteen beers of christmas that were being brewed for a Christmas beer exchange and party. I chose to brew the Christmas Gruit, which is based on a smoked weizenbock with the addition of a number of gruit herbs, juniper being the most prominent among them.

I made a ten gallon batch of a smoked weizenbock using homegrown hops in the boil. After chilling I split it into two fermentors and each one got a different yeast, one used my wild hefe yeast and the other used a recently caught yeast from some wild grapes I found growing near my home while taking the dog for a walk. This new yeast seemed promising in the initial starters so I decided to risk it on a full batch, I’m glad I did.

Ingredients:
10 lbs Wheat malt
8 lbs munich malt
2 lbs crystal 60
2 lbs northwest pale malt
2 lbs rauch malt
2 lbs torrified wheat

2 oz homegrown Hallertauer first wort 90 minutes
1 oz homegrown Mt. Hood 30 minutes

OG: 1.070

After about three weeks I had to decide which batch to add the gruit herbs and spices to so I took a sample of each and added some crushed juniper berries to them both and let it steep for a few hours and then tasted them both. I decided that the batch with the new yeast lent itself better to the flavors of the juniper, the hefe yeast batch was accentuating the smoke flavor from the rauch malt (perhaps the due to clovey phenols?) which was fighting with the juniper flavor. So I kegged that batch at this point as a tasty smoked weizenbock.

I racked the remaining batch into a 5 gallon carboy to which I had added:
1 lb of honey
8 oz crushed juniper berries
4 bay leaves
1/2 tsp rosemary
2 tsp cinnamon
1 tsp sweet gale
1/4 tsp mace

I left it to secondary on the gruit for six weeks or so, the honey should add about 7 points to the gravity and should ferment out completely. After the six weeks the gravity seemed* to be stable at around 1.007 (putting this beer at 9.1% abv) so I racked it into a bottling bucket with priming sugar and bottled into 12 oz bottles. This is the first time I’ve bottled an entire 5 gallon batch of beer in many years and it just helped to remind me of how great kegging is.

Since I was going to give a number of these bottles away at the exchange I decided that labelling would be appropriate. I designed the labels to be 7.5 inches wide by 3 inches high and printed three to a standard 8.5×11 sheet of paper and cut them out by hand. Since I was printing three to a page I decided to use three different Dora head illustrations for a bit of variety. I stuck the labels on with milk. Labelling bottles is nearly as tedious as filling bottles, once again: kegging ftw.

I’m really pleased with the new yeast, especially happy that it took the beer to 9%. It is actually quite similar to my abbey strain in the esters it produces. My next beer is going to be a split batch with these two yeasts side by side. I’m hoping they are the same, which would point to this yeast being the dominant strain in the neighborhood, though additional local harvests would need to be done to further verify if this is the case. The beer is quite good, and VERY junipery, especially on the aroma, with some additional herbal things behind the juniper and supported by maltiness in the background. If I were to make this again, I would cut the amount of juniper in half. That said it is still a very tasty beer and I’m pleased to drink it.

More photos

Brewing a Cypress beer

In Norway there is a tradition in a lot of farmhouse brewing to use a juniper infusion for your strike and sparge water. Basically, strike and sparge water are heated in the kettle with juniper boughs. Additionally, juniper boughs are used in the mash vessel as a filter bed/false bottom to aid in lautering.

I don’t have access to much juniper where I live, but I have a bunch of Leyland Cypress trees on my property and the boughs of this tree make a really nice tea. So I thought it would be an interesting experiment to try making beer using cypress infusion in the spirit of traditional Norwegian brewing. It didn’t hurt that I am of Norwegian ancestry either.

So I trimmed a few branches off of a tree and set up my HLT and mash vessel with a bunch of cypress boughs for the brew.

I also took this opportunity to attempt a 15 gallon batch of beer. I have a 19 gallon boil kettle so I can’t quite do a full boil without making a huge mess via boiling over but I can get pretty close. I figured I’d just top up at the end of the boil before chilling, which is what I did.

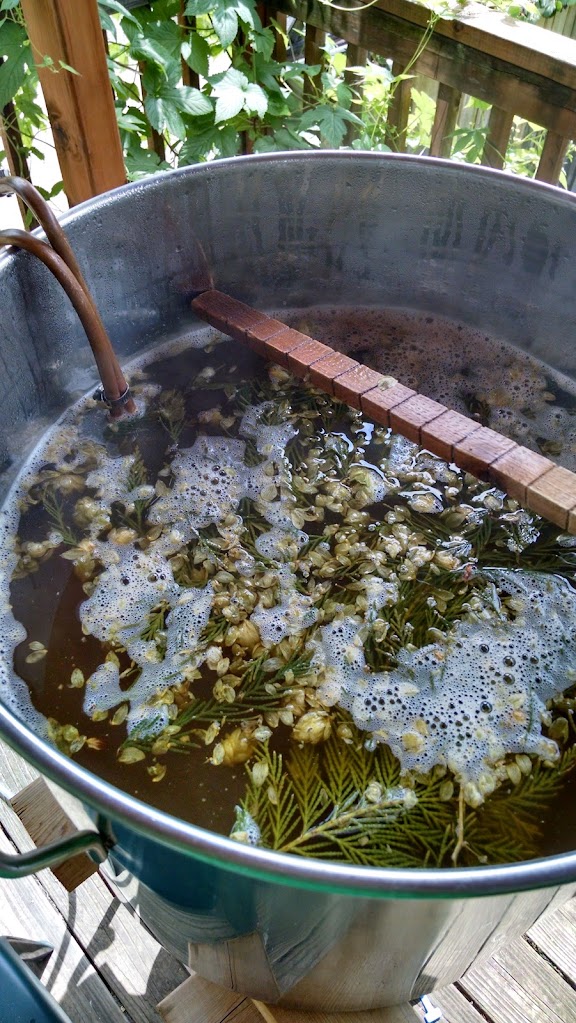
The strike water had a nice piney aroma to it, I hopped with all glacier hops, which, if you’re not familiar with them, they are described as ‘hoppy’ which seems unhelpful, but it actually fits quite well. I really like these hops and I’d like to get some rhizomes to grow them next spring.

For the 15 gallon recipe I used the following ingredients:

  • Loads of spruce boughs (I didn’t weigh them) for the strike and sparge water, and also in the mashtun.
  • 18lbs Pilsner Malt
  • 2lbs Aromatic Malt
  • 2lbs Cara-pils Malt
  • 2oz Glacier Hops (first wort) @90 Minutes
  • 1oz Glacier Hops @10 Minutes
  • Mute Dog Abbey Yeast
  • Mute Dog Palatki Yeast
  • Brewery Ommegang House Yeast

Each of the three yeasts fermented a separate 5 gallon batch of the beer. I ended up unintentionally mashing a lot lower than I had planned. I think my problem is inaccurate volume measurements when I pour the strike water into the mash vessel. Anyway I mashed at about 148F for an hour and did a 90 minute boil. At flame out I topped my wort up to 15 gallons and chilled it down to 75-80F and drained into 3 separate carboys for fermenting with the three different yeasts. The OG was 1.039, one point higher that BeerSmith calculated.

After 2-3 weeks of fermentation I took some gravity readings and the gravity for each batch was crazy low ~1.001. I sampled all three batches and they were good, very dry somewhat saisony tasting. I kegged the batch that fermented with my Abbey yeast and left the other two batches alone.

After drinking off the keg for a bit, I felt like you couldn’t really taste much in the way of cypress in the beer. There was just a hint of something slightly different about the flavor of the bitterness that maybe might possibly be cypress, but it if you didn’t know about the cypress, you probably would even notice, let alone identify it as cypress.

I decided to try dry cypressing one of the other two batches. The beers had been in primary for about two months by this time. The batch with the palatki yeast looked to be forming some sort of brett pellicle so I figured I’d leave that one alone to get funky and dry cypress the batch with the ommegang yeast. I took another gravity reading and it had gone down to 0.997!

I collected 12oz of additional cypress boughs and added them to a brew bucket, then I racked the beer onto them, sealed up the bucket and put an airlock on. I let them steep for about a week before racking the beer into a keg. The beer has been in the keg for almost a week now and it is just beginning to get fully carbonated. It tastes incredible. I may have overdone the dry cypressing, it is intense in the aroma and flavor of the beer. An earthy, woody, aroma, followed by a fruity, almost christmas tree but not quite, citrusy/ascorbic acid flavor, with some malt and hop bitterness in the background.

I really like it a lot.

I’m not sure what fate lies in store for the last 5 gallon batch, I figure I’ll let it hang out for a few more months and see if the brett does anything interesting to it. I do know that I definitely like this beer and it will likely need to become part of some sort of seasonal rotation or something. I do want to see how the flavor might be different from boughs harvested in the spring vs late summer as my wife tells me she can definitely taste a difference in the tea she’s made recently vs the stuff made in the spring.

View all the photos from the creation of this beer on imgur.

Turmeric Bug

Ginger bug is the term for the wild yeast and (generally lacto) bacteria found on ginger. To get some you grate up some (non-irradiated) ginger root, combine it with some sugar and water in a jar and wait. I was reading in Sandor Katz’s The Art of Fermentation that the same thing could be done with Turmeric and Galangal root. I’d never seen turmeric in root form for sale anywhere, but I happened to notice some the other day at my local highfalutin grocery store. It was pretty expensive so I just bought a tiny piece. I brought it home, grated it up, added a few tablespoons of sugar, a bit of yeast nutrient and some warmish water. A day or so later it was bubbling away rather vigorously!

I’m assuming I have some combination of yeast and lacto bacteria here. It smells like intense turmeric so it’s hard to tell if it is getting sour at all. I’m going to let it go for a week or so while I try to decide what I should do with it. I was thinking I’d like to make a turmeric ‘beer’ like a ginger beer, but the root is pretty expensive. Maybe I’ll just try a gallon batch for starters and see how it is.

More wild yeast

so what else is new? When I made cider last fall from my apples it began fermenting on its own, and in a panic I shoved a bunch of the Hefe strain in on top of whatever was already fermenting in there. So now I have a bunch of flocculated yeast from that batch and I was thinking I should try fermenting something with it and see what it does. Maybe I should try the cider first?

What I should probably do as a responsible yeast owner is to plate all of these cultures up and separate them from their friends. Well until I bother to get the equipment for that I remain in the realm of primitive yeast wrangler, I guess.

Harvesting yeast from honey

This has got to be one of the easiest ways of harvesting wild yeast, at least of the methods I’ve tried it worked on the first try and I’ll be brewing a beer to ferment with this yeast this coming weekend.

As you may know honey is naturally preservative, ie it won’t ever spoil on its own. Honey has some natural anti-bacterial properties in it, bees are pretty awesome that way. Of course one of the main reasons that honey won’t go bad is because sugar is a preservative. Yes, sugar. Ever noticed how the bag of sugar in your pantry also never goes bad? Sugar at very high concentrations is a preservative. Think of the fruit preserves your grandma used to make perhaps.

Anyway just because honey is a preservative doesn’t mean there’s not some of our friendly yeasty pals sleeping dormant in the honey just waiting for it to become diluted enough to get to work on all that glorious sugar. The key to harvesting yeast from honey is to get raw or unpasteurized honey. I was lucky enough to buy a whole bunch from a neighbor of mine that keeps hives in their back yard. So the yeast is a uber-local, yay!

Anyway, what you do is get a sanitized container, like an ehrlenmeyer flask or heck use a clear beer bottle. Add some of the unpasteurized honey, add about 4-5 times as much water as honey, plus a bit of yeast nutrient or energizer. Swirl it all up to dissolve the honey and nutrient in the water and then stick a bung and airlock on and wait. Don’t become discouraged it may take a few days, my concoction sat around doing what looked like nothing for a couple of days before I noticed the beginnings of fermentation.

I’ve only done this once and it worked, and was not contaminated so I’m not sure if that’s typical with harvesting yeast from raw honey or if I’m just lucky. However you will likely be able to tell by sight and smell if you have an infection. if it looks like you’ve just got yeast let it ferment completely and let the yeast settle. Then draw off some of the fermented liquid (which is technically mead) with a thief or baster and give it a taste. Mine had some fruity notes which I’m not sure if they were from the honey or the yeast (the local honey had a really fruity flavor to it) and no off tastes like bandaid or solvents.

If the yeast seems good then on to the next step: ferment a beer with it! which I’ll be doing hopefully this weekend. I put together a simple recipe for a sort of belgian pale ale and I’ll be adding my small starter of wild yeast to it and see what I get.

Is this beer infected? Yes it is.

A lot of threads over on the Homebrewing Subreddit ask if their beer is infected, and 99% of the time it’s not. Well this beer is infected! I infected it myself. Here’s the story:

A while back I harvested two different wild yeasts, one from some juniper berries I picked at the Palatki indian ruins in Sedona, AZ and the other from a date purchased at the local super market, though the date originated in Mexico. Both of these sources provided me with yeast and bacteria when I initially added them to starters. I washed these starters using chlorine dioxide (which I should really write a post about). I’d never washed yeast before and I wasn’t entirely confident that I wouldn’t kill the yeast along with the bacteria, so I saved a bit of each starter aside before I washed. The washing process did work however and I got my yeast sans-bacteria, these two strains became my Palatki Strain and my Fruity Strain respectively.

Since I am lazy I just kinda left the two vials I saved some of each initial strain out (covered of course) in my office for a few months, one of them grew a strange goopy yeast colored sort of pellicle, they both got rather sour (yes I did taste them). I have been wanting to brew up some sort of lambic-like beer and I thought to myself, I will just blend these two infected starter batches together and step that up and put it into a beer. So that is what I did. I won’t know how the beer turns out for a long while yet, but I pulled the beer out of my fermenting fridge today after being in there for 3-4 weeks in preparation to rack it into a new carboy for an extended secondary. and it had the funky pellicle on top. It is definitely infected:

So there you go, if you were wondering what an infected beer looks like. This one is infected and that’s what it looks like. Other infections can look different, but this is how mine looks.

I gave it a whiff after moving it and it has a sour but very fruity aroma, I’m looking forward to this beer, I think it’ll be excellent and I’ll have my very own bug farm for future sours.